The Ultimate Guide To Heat Pressing DTF Transfers
Even the best artwork and highest-quality DTF prints can be ruined by a bad press. That means failed shirts, unhappy customers, and a hit to your reputation. This guide breaks down the full heat press workflow—from pre-press to post-press. You’ll learn why each step matters and what it takes to get consistent, pro-level results.
Page Content
Before You Continue...
This guide does not assume where you purchased your prints or what level of quality you're working with. Instead, it focuses on helping you build a heat press workflow that fits your specific goals and production environment.
The quality of the DTF print absolutely affects the final outcome—but that's a different conversation. What you'll learn here is how to craft a workflow that's suited to your budget, equipment, and expectations.
If you're curious about what makes a high-quality print and how to evaluate it, you can learn more here. But for now, this guide is all about the press stage—drilling down into the science and best practices of applying DTF transfers with precision and repeatability.
The Full Workflow at a Glance
Establishing a reliable and consistent heat press workflow is essential to getting great results with DTF transfers. Your workflow should reflect the needs of your shop, your production volume, your budget for equipment, and the quality of the prints you’re working with.
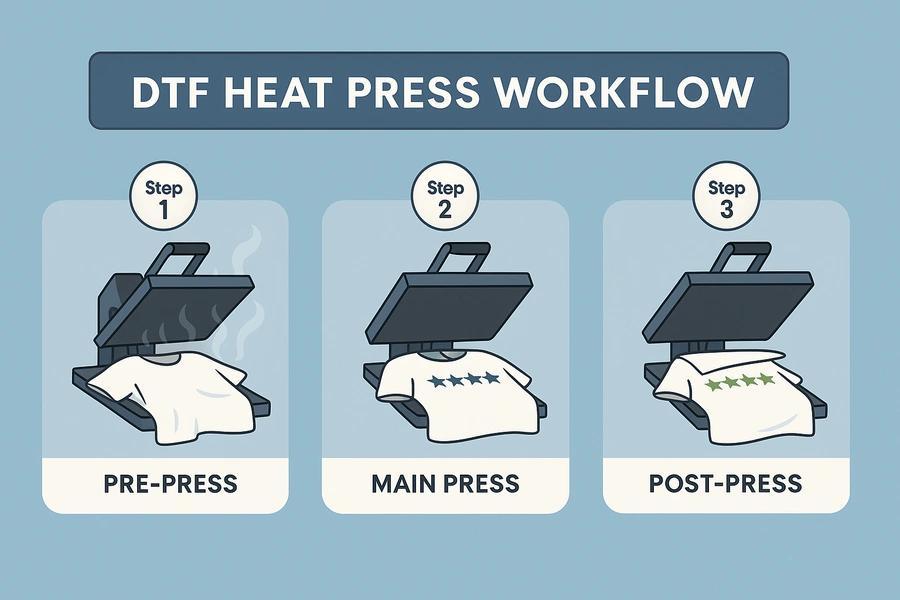
The ideal DTF workflow includes three key stages:
- Pre-Press
- Main Press
- Post-Press
We'll cover each of these steps in more detail, but it's worth noting that not every workflow requires every step. The importance of each stage depends on your equipment and the type of prints you're using.
For example, if you're using budget or hobby-grade prints, and you're not producing for customers or demanding end-users, a long, hot press might be all you need. Many discount print providers recommend pressing at 320°F for 20 seconds, which can give you durable results, but at the cost of feel and color quality. That might be perfectly fine if you're making joke shirts for a party.
However, if you're delivering transfers to customers who care about feel, color, softness, and wash durability—especially brands or small businesses—you need a more complete workflow. That includes all three stages:
- Pre-pressing to prep the garment
- A precision main press for accurate adhesion
- And a post-press to lock in durability and elevate finish quality
Each of these steps has a distinct role in producing prints that not only look good but last.
Workflow Step 1: Pre-Press
This step is technically optional—but we NEVER skip it. Especially when working with commercial-grade prints designed for low temps and short press times.
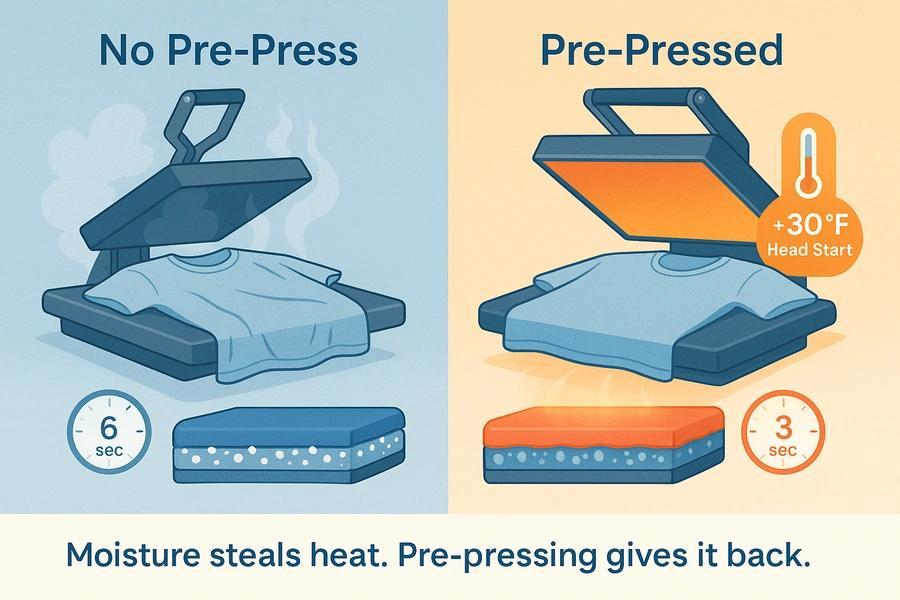
The primary reason for pre-pressing is to release any moisture trapped in the garment. Moisture is a killer for adhesion. It robs the TPU adhesive powder of the consistent heat it needs to fully melt and flow into the fabric fibers. That’s not a big deal with long, hot presses—but if your goal is a soft, natural feel with lasting durability, this step is critical.
Additional benefits of pre-pressing:
- Flattens fibers and seams for smoother contact
- Pre-heats the fabric surface, reducing thermal lag during the main press
- Helps ensure even pressure distribution
Recommended Pre-Press Settings:
- 3–5 seconds
- At your target press temperature
Skipping this step means you'll likely need to double your press time to compensate—but that comes at the expense of feel, color vibrancy, and wash durability.
Workflow Step 2: The Main DTF Transfer Press
Your Equipment Matters
There’s a lot to unpack in this step, but it starts with one key element: your equipment.
And hey—we get it. Pro-level gear isn’t always in the budget. If that’s the case, just know you’ll need to increase your press time to compensate. Even with our transfers, which are calibrated to fuse at 290°F for as little as 3–5 seconds, you’ll likely need to press for 10–12 seconds if your press isn’t dialed in.
But let’s be clear: no matter what transfers you’re using, poor equipment = unpredictable results. This is thermal science. Physics doesn’t care about your budget or opinions—it just cares about heat transfer, pressure, and time.
What Makes a Reliable Heat Press:
You’ll find endless posts online asking “what’s the best press?” with a million answers. Instead of recommending a brand, here are the qualities you should look for in a press that can deliver professional-grade results:
- Flat, even platens with minimal warp or deflection
- Accurate and stable temperature across the full surface
- Even, consistent pressure that doesn’t shift over time
- A robust hinge or clamping system that closes uniformly
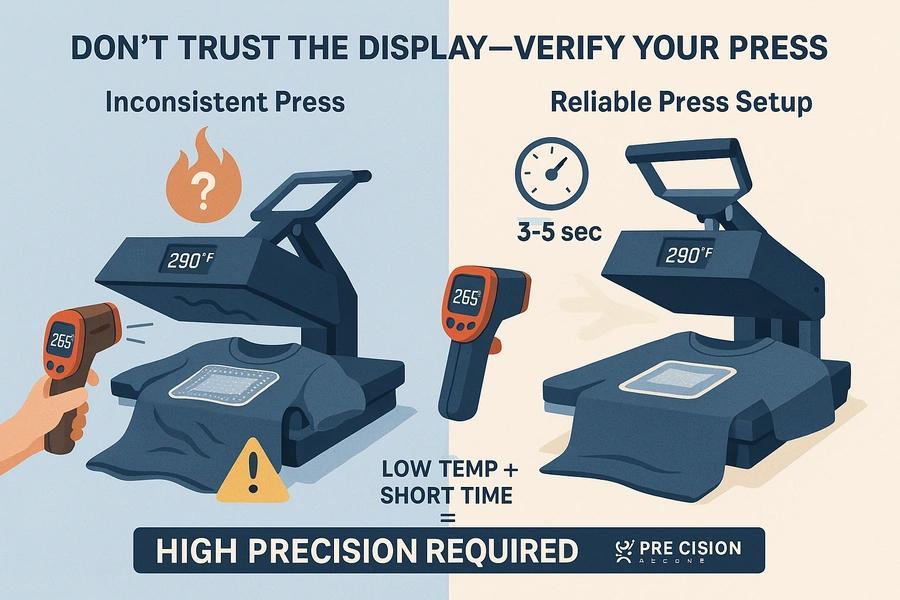
Even with a great press, you still need to verify it. We strongly recommend using a thermal temp gun to check your platen surface—not just in one spot, but across all corners and center zones. This helps you identify cold spots or uneven heating.
Once you’ve confirmed heat, check your pressure consistency. This is where pneumatic presses really shine. They aren’t required, but they give you tight repeatability and peace of mind—especially at scale.
Follow The Press Instructions:
Once your press is verified and your workflow is dialed, follow your print provider’s instructions. There’s always room for some variance depending on your shop, garment types, and press—but it’s important to stay close to the guidelines.
Press Temp and Time Will Vary From Printer to Printer
It’s worth noting that DTF press instructions vary widely from one printer to another, and there’s a good reason for that. Press time and temperature depend heavily on the manufacturer’s process and the materials used. For example, when you see a print that requires 320°F for 30 seconds, it's likely made using lower-grade consumables—budget TPU powder, low-cost ink, or uncalibrated film. These types of prints demand more heat and time to bond properly.
Sometimes, a printer will also compensate for inconsistency in their process by recommending longer presses just to “cover the bases.” That may work fine in budget workflows, but if you want soft hand feel, vibrant color, and tight detail—you’ll need a more precise system.
Stick with your provider’s recommendations and confirm your setup can meet those parameters consistently.
For DMandprints DTF Transfers, We Recommend:
- 290°F for 3–5 seconds main press
- Firm, even pressure (adjust based on garment thickness; cottons generally tolerate more pressure than blends)
If you skip the pre-press, don’t verify your temp, or plan to skip the post-press, then press for 10–12 seconds to ensure full adhesion.
Workflow Step 3: Post-Press – The Final Touch
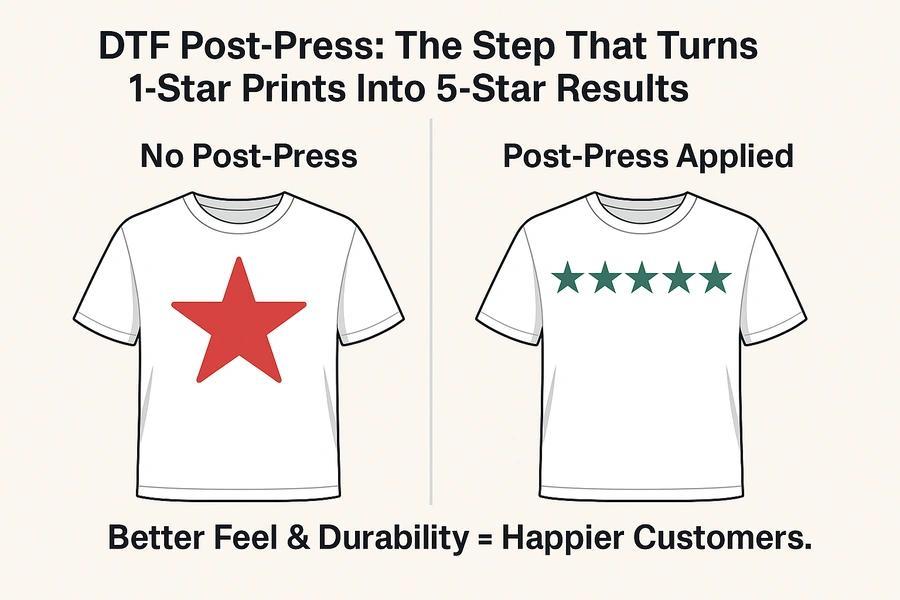
This final stage is often overlooked—but it’s the finishing touch that ensures your print holds up under wear and washing while delivering a premium look and feel.
Improved Durability
If you’ve pre-pressed and main-pressed correctly, your transfer should be well-adhered. But that doesn’t mean it’s fully fused. A quick post-press helps complete the annealing process of the TPU adhesive. This allows it to finish flowing into the fibers of the fabric and bond more completely. The result? Stronger durability, fewer edge lifts, and better wash performance.
Improved Hand Feel
The post-press also greatly improves hand feel. By placing a breathable barrier—like a 100% cotton finishing sheet—between the transfer and the upper platen, you can:
- Matte down any residual texture
- Reduce unwanted gloss or press lines
- Add a subtle, professional finish
Top Sheets for the Post Press
You may see companies selling silicone pads, parchment sheets, or other top-sheet products to do this. Those can work fine, but in our experience, a well-washed cotton blank or T-shirt scrap works perfectly—and avoids any gimmicks.
Recommended Post-Press Settings
- Use your main press temp. Our's is 280 to 290°F
- 2–4 seconds
- Medium pressure
- Use a top sheet. 100% cotton is what we use.
You don’t need to crush the garment—just a short, gentle second press will seal the deal.
DMandprints Recommended Press Settings & Workflow Examples
We’ve saved our specific settings for the end of the guide—not because they’re a secret, but because good results don’t come from numbers alone. They come from good prints, good gear, and a repeatable process.
Here’s how our calibrated DTF transfers are designed to perform across different workflows and setups:
Heat Press Demo Under Ideal Conditions
Scenario 1: Ideal Setup – Full 3-Step Workflow
You’ve got a reliable heat press, you’re doing a pre-press, a calibrated main press, and a quick post-press. This is the workflow we recommend for best results.
Expected Benefits:
- Soft, natural hand feel
- Maximum vibrancy and color accuracy
- Long-lasting durability and wash resistance
Settings:
- Pre-Press: 3–5 seconds at 290°F, light pressure
- Main Press: 290°F for 3–5 seconds, firm pressure
- Post-Press: 290°F for 2–4 seconds with cotton sheet
Scenario 2: Ideal Setup – Main Press Only
You’ve got a high-quality press but you’re skipping the pre- and post-press stages to save time.
What to Expect:
- Still solid adhesion and durability
- Slightly stiffer feel, especially on larger designs
- Less consistent color depth and matte finish
Settings:
- Main Press Only: 290°F for 10–12 seconds, firm pressure
This works, but you’re sacrificing hand feel and premium finish for speed.
Scenario 3: Basic or Budget Press – Just Make It Stick
You’re working with an entry-level or inconsistent heat press. If that’s the case, don’t try to run our 3–5 second press—it’s not going to give you reliable results.
Here’s the reality:
- Short presses require excellent pressure and heat consistency
- Budget presses often fall short on both
So if this is your setup, skip the extras and just give the print a long, firm press:
Settings:
- Main Press Only: 290°F for 12 seconds, firm pressure
You’ll still get durability, but don’t expect perfection on feel or finish. And just know—you’re pushing the edge of what the print is capable of. Our prints are good, but they’re not coated in magic DTF fairy dust.
Conclusion: Why This Matters
There’s no one-size-fits-all set of heat press instructions. What works for one print or setup may not work for another. That’s why understanding how and why DTF heat pressing works is essential—not just following numbers blindly.
We hope this guide has helped shed some light on each stage of the workflow and given you the tools to build a process that fits your shop, your time, your budget, and your goals.
It’s absolutely possible to create professional-grade products with DTF transfers—but it requires more than just good artwork. You need high-quality prints and a calibrated, reliable heat press workflow. Whether you're optimizing for speed, feel, durability, or all of the above, the key is to align your expectations, gear, and workflow accordingly.
Don’t leave quality to chance. Know what you’re aiming for—and press with purpose.
Page Content
What People Are Saying
FIVE STARS!
"With Dmandprints, I’ve increased my business by over 30%, while saving both time and money. Their quality, service, and attention to detail have been outstanding—highly recommended!"
Essential Tips for Quality DTF Printing
Our guides are perfect for both beginners and seasoned print professionals. Discover valuable tips for creating artwork, mastering heat press techniques, and more. These resources ensure you achieve the best quality final product.
What Makes Dmandprints Different
Loading...
Popular Guides
Loading...
Creating Images for DTFs
Loading...
Feature Articles
Loading...
Q & A
Common Questions
Here are some quick questions and answers we frequently get about DTF prints and DMandPrints. We've placed them right here on the home page for your convenience!
Do you really think you have the best prints in the world?!
Do you really think you have the best prints in the world?!
Mmm... we think they’re pretty great—and we work relentlessly to keep making them better. It’s a bold claim (maybe even a little cocky), so we’ll let the results speak for themselves.
Do you sell printed garments?
Do you sell printed garments?
No, we only sell the prints.
You can purchase your own garment and a heat press to apply the heat transfer prints to your own garments. Our customers are typically small, medium and large screen printers that want to offer heat transfers as an alternative to their standard screen printing process.
Is Gang Sheeting Necessary for Your Artwork?
Is Gang Sheeting Necessary for Your Artwork?
There is no need to gang sheet your artwork.
We charge only for the actual print area. Our image processing system automatically removes any unnecessary transparent space around your image to accurately calculate the print area for our per-square-inch pricing.
Gang sheeting not only costs you time but can also cost you money. We can only trim transparent space around the edges of your artwork. If you create a gang sheet yourself, you might introduce unprinted space that increases the total square inches, leading to higher costs.
Summary
The easiest and most cost-effective way to get your prints is to simply upload your artwork. We'll handle the gang sheeting for you, saving you both time and money.
Are DTF prints better than traditional screen printing?
Are DTF prints better than traditional screen printing?
It's not a matter of being better or worse; DTF (Direct to Film) printing is simply an alternative to traditional screen printing. Both methods have their own unique advantages.
DTF heat transfers feel similar to screen-printed shirts and can often be more durable. Additionally, DTF printing allows for unlimited colors in a single print, providing flexibility for intricate and colorful designs. On the other hand, screen printing is well-loved for its ability to produce vibrant, long-lasting prints, especially in bulk.
Choosing between the two methods depends on your specific needs and preferences.
What types of fabrics can DTF prints be applied to?
What types of fabrics can DTF prints be applied to?
DTF prints can be applied to a variety of fabrics, including cotton, polyester, blends, leather, and even some non-textile materials.
Are DTF prints durable?
Are DTF prints durable?
Yes, DTF prints are known for their durability and can withstand multiple washes without fading or peeling.
Do DTF prints feel heavy or stiff?
Do DTF prints feel heavy or stiff?
No, DTF prints have a soft feel and do not add significant weight or stiffness to the fabric.
Can DTF prints be used for detailed and colorful designs?
Can DTF prints be used for detailed and colorful designs?
Yes, DTF prints are excellent for detailed and colorful designs, providing vibrant and high-resolution results.
Is DTF printing cost-effective for small batches?
Is DTF printing cost-effective for small batches?
Yes, DTF printing is cost-effective for both small and large batches, making it ideal for custom and limited-run designs.
Can I create DTF prints at home?
Can I create DTF prints at home?
While it's possible with the right equipment, most people prefer to use professional services for higher quality and ease of use.